E-Bike Battery Project (2024 Build)
In 2024, I had the urge to build an e-bike after finding the Tongsheng TSDZ8 (750W) on sale. At that time, none of the available off-the-shelf battery packs met my specifications, most were either too expensive, too large, or required long build-to-order lead times. So, I decided to design and build my own battery pack.
Process Overview
Informal Analysis
Power Requirements
Battery Selection
Thermal Requirements
Battery Casing Selection
Design Selection & CAD
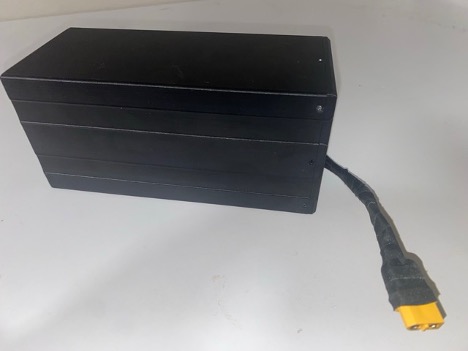
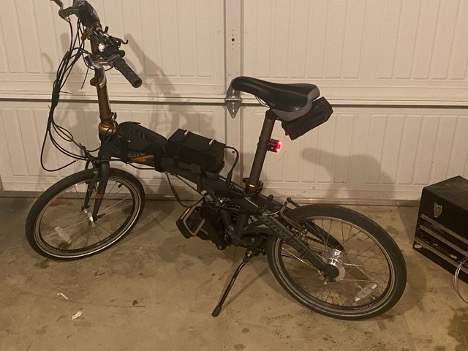
Final: E-Bike Build and Photos
Unsorted Notes & Calculations (view at your own risk)
Power Requirements
I started with rough calculations for the power required to maintain various cruising speeds and to climb hills, based on rolling resistance and aerodynamic drag.
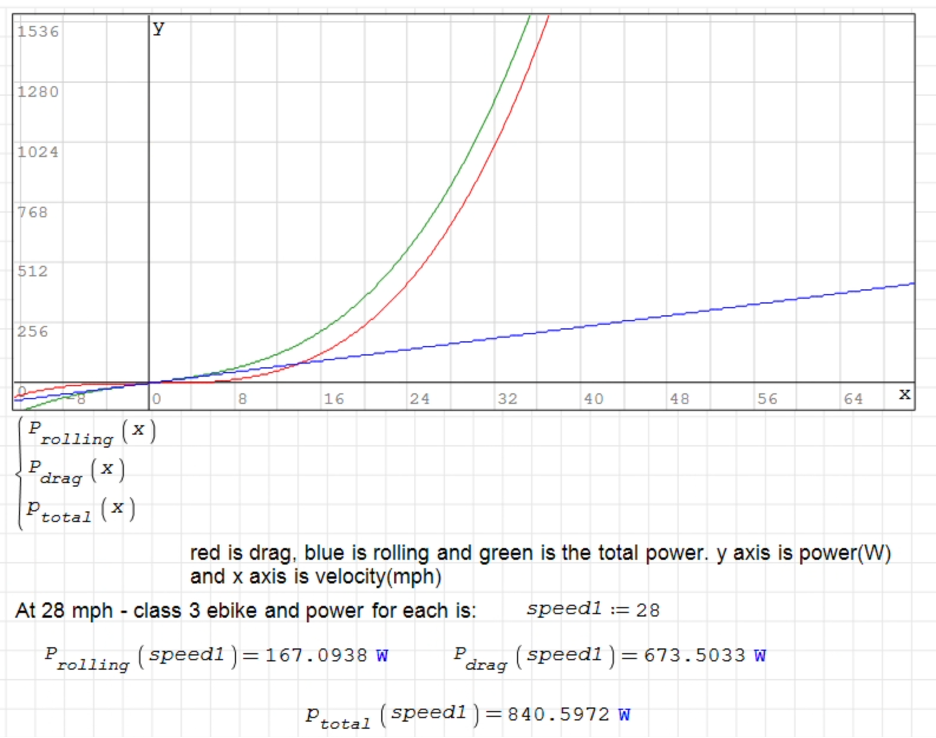
At 28 mph (Class 3) on flat terrain, the bike requires roughly 840 W. More detailed calculations are available at the bottom of the page.
To estimate maximum power demand, I calculated the requirement for a 10% grade (≈ 5.7°), which is considered a steep hill. The result came out to approximately 1798 W.

Of course, you are not climbing a 10% grade at 28 mph on a mid-drive motor. Modern DIY e-bike motors and BMS systems include current limits (many of which can be bypassed), so realistic usage is much lower. In the case of the TSDZ8, its peak power rating is 1150 W.
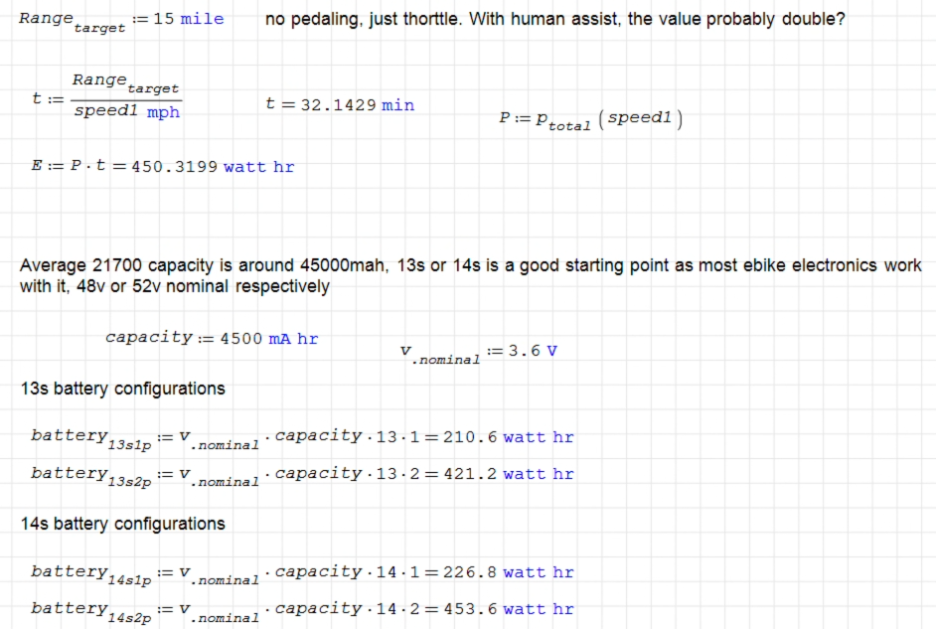
Energy & Range Requirements
My goal was for the bike to achieve at least 15 miles even without pedaling assistance, although realistically I would always pedal since the TSDZ8 uses torque-based assist.
Because this battery was going into a 20-inch folding bike, I wanted it compact without sacrificing too much capacity. This narrowed my configuration choices to:
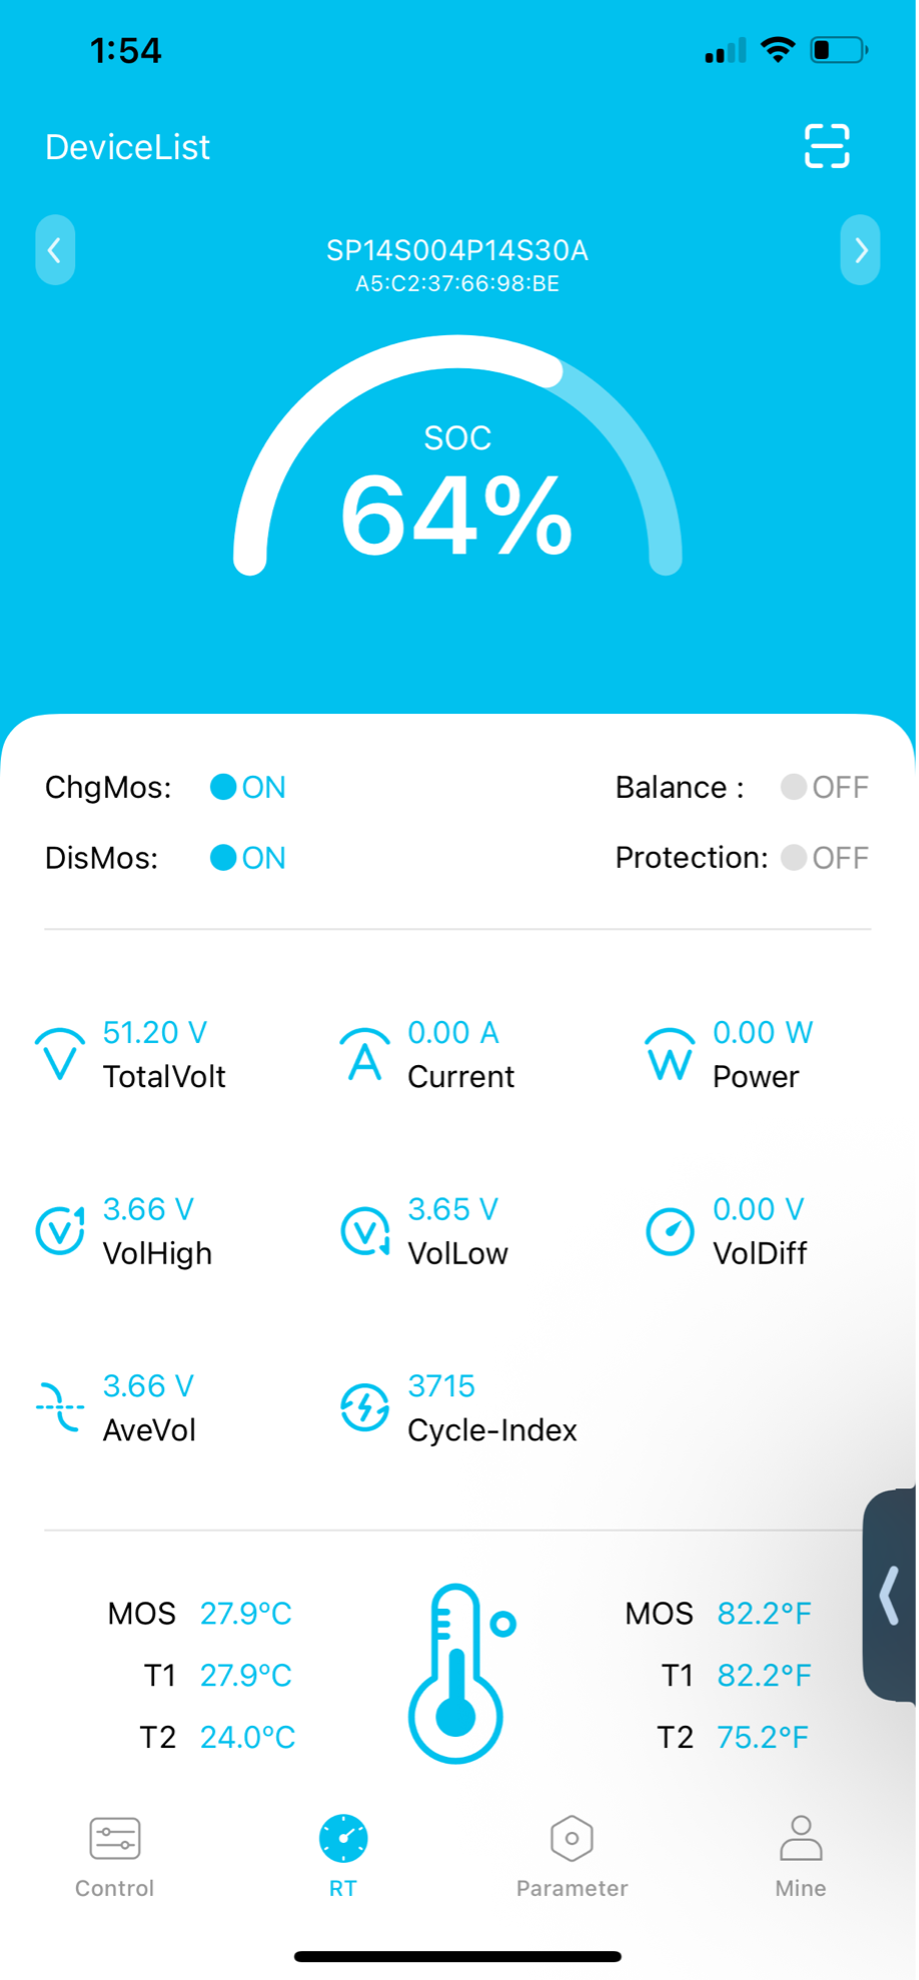
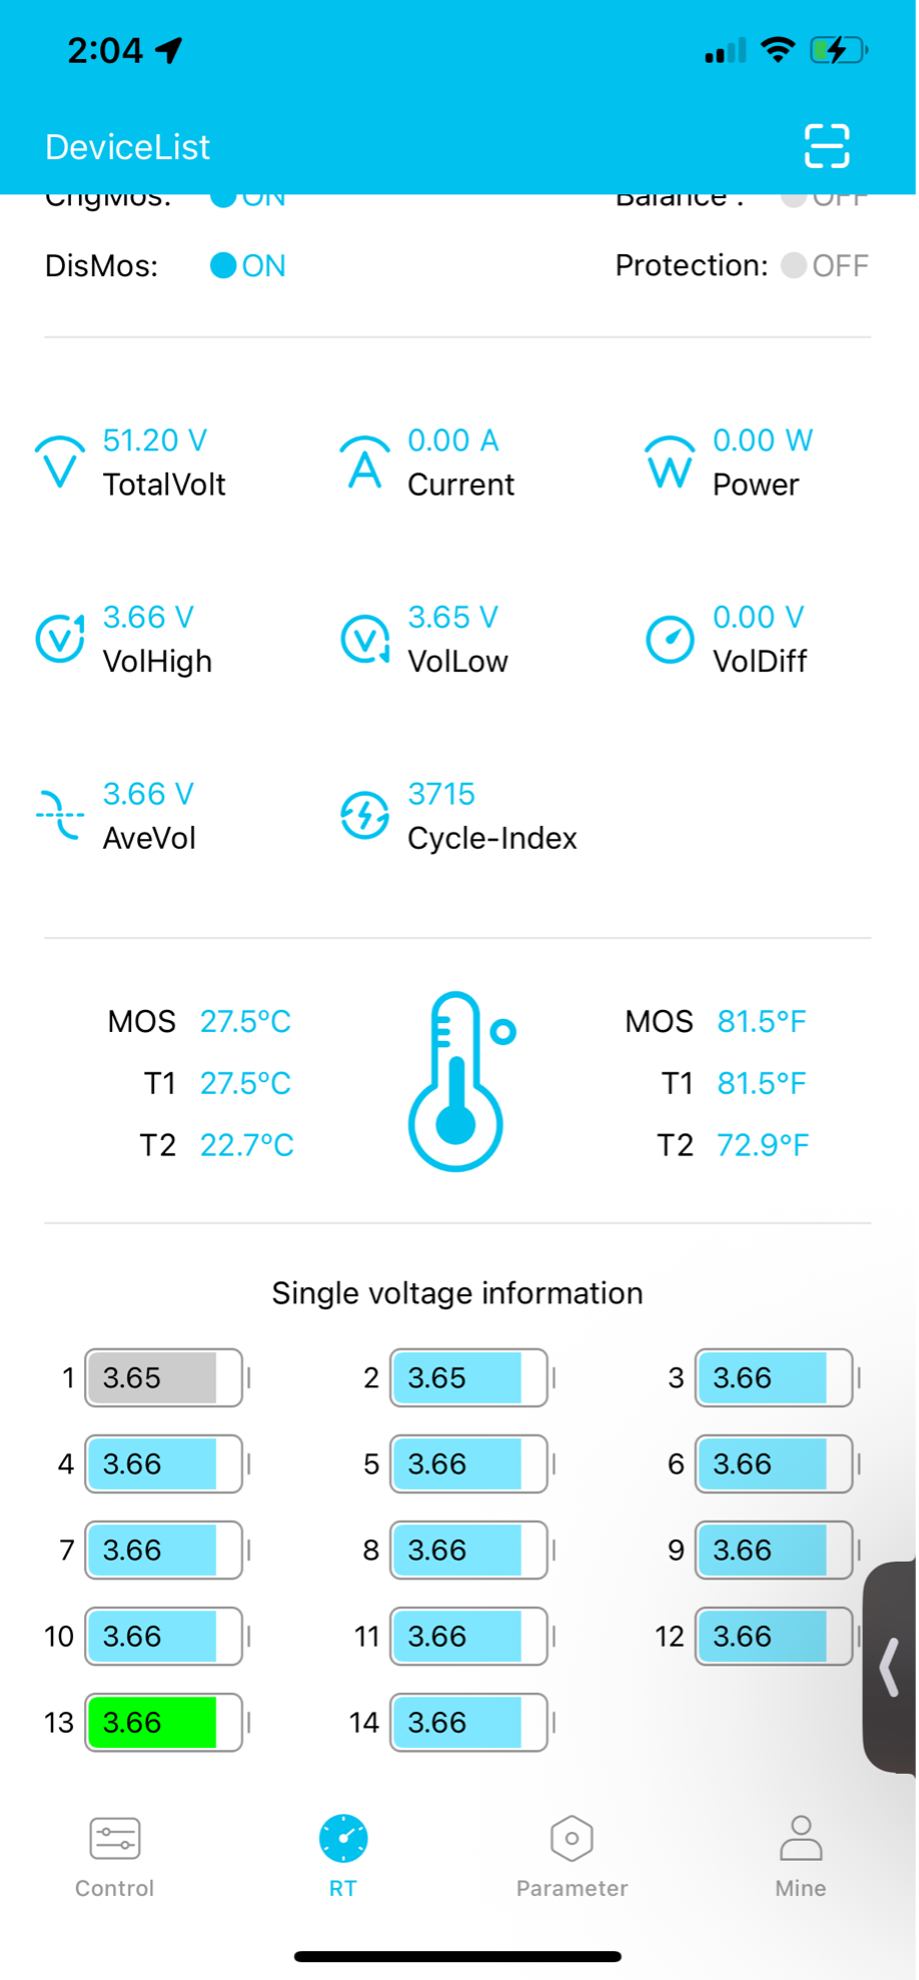
13s1p
13s2p
14s1p
14s2p
Series (S): increases voltage (e.g., 13 × 3.6 V).
Parallel (P): increases capacity.
I ultimately chose 14s2p, which — using typical 4.5 Ah 21700 cells — provides roughly:
14s2p ≈ 454 Wh
The specific cells I purchased resulted in ~5 Ah, approximately 504 Wh.
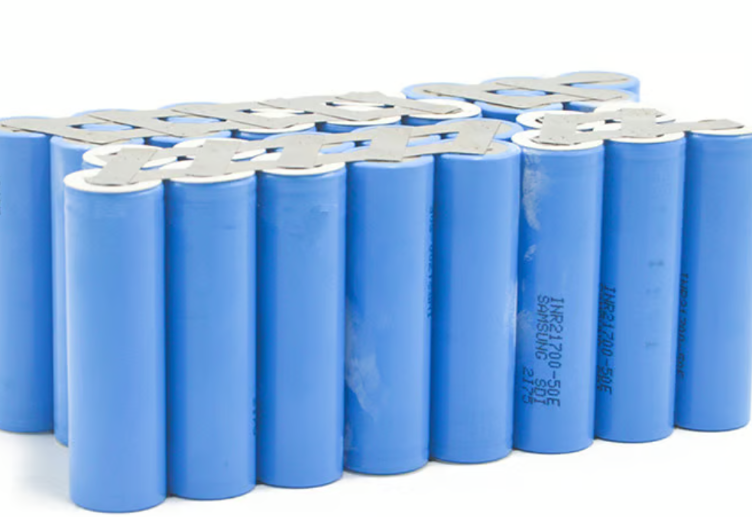
Battery Cell Selection
The two main candidates were:
EVE 50E 21700 — 5000 mAh, 15A
Molicel P42A — 4200 mAh, 45A
At the time of purchase, the EVE 50E was about 70% the cost of the P42A and met all of my output and capacity requirements, so it became my final choice.
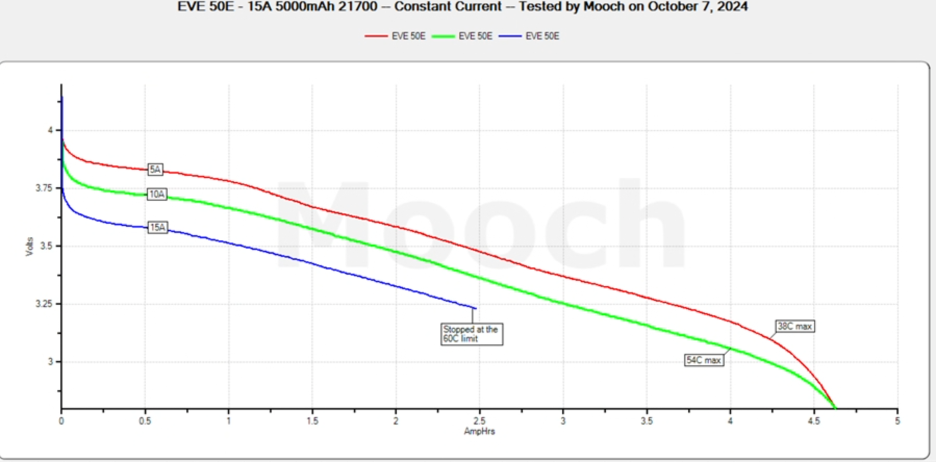
Even though the EVE’s 15A rating is lower than the P42A’s 45A, it can still deliver:
~840 W (10A) continuously at 3.0–3.3 V
~1260 W (15A) peak for roughly half the capacity (thermally limited)

Since my build is not throttle-only and the motor is 750W nominal / 1150W peak, the EVE cells are sufficient.
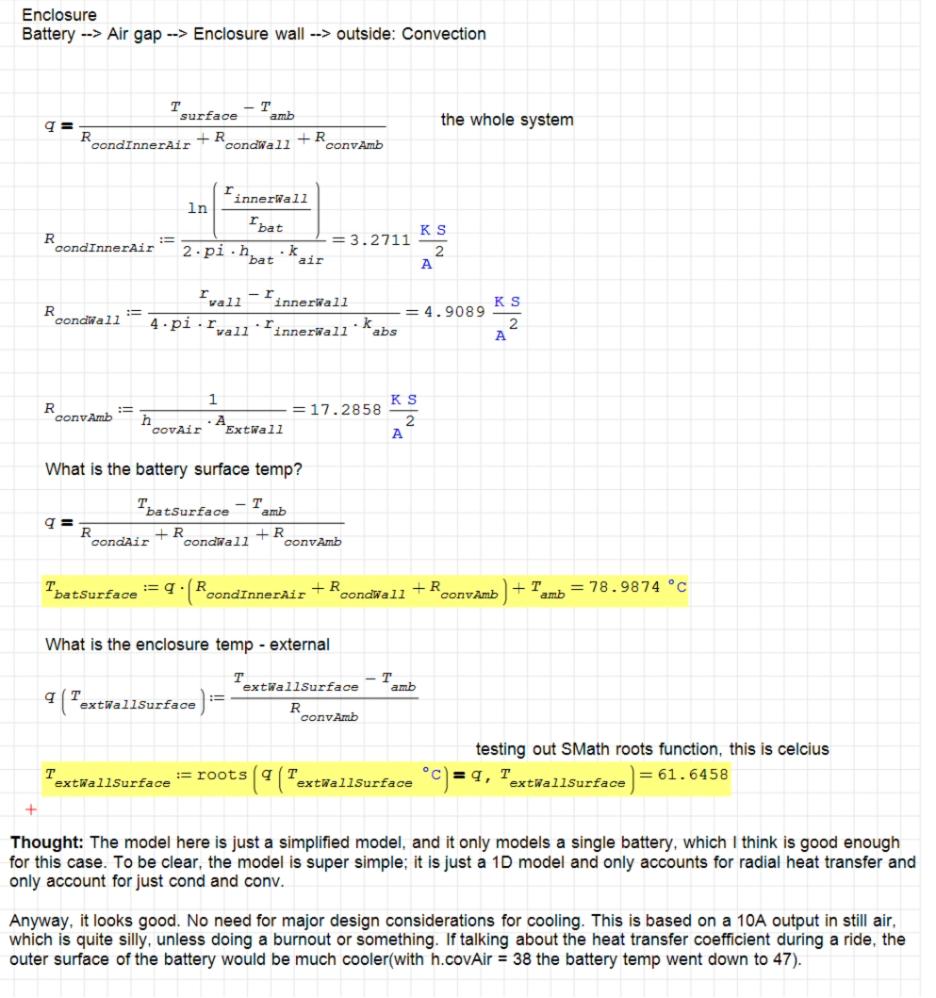
Thermal Requirements
I like to say I follow Apple’s design philosophy: form over thermals, with anything related to heat treated as an afterthought. (Just sarcasm, I actually owned the M1 MacBook Pro.)
My design goals:
Simple
Compact
Fully enclosed
No active cooling
Evaluate feasibility through thermal modeling
Because I chose 14s2p with EVE 50E cells, I was concerned about heat buildup. With 14s3p or high-discharge cells like P42A, heat concerns would be lower.
Thermal Model Used
Single 21700 cell
ABS plastic enclosure
~0.4 mm air gap
1D steady-state conduction/convection model
This provided a reasonable worst-case approximation.

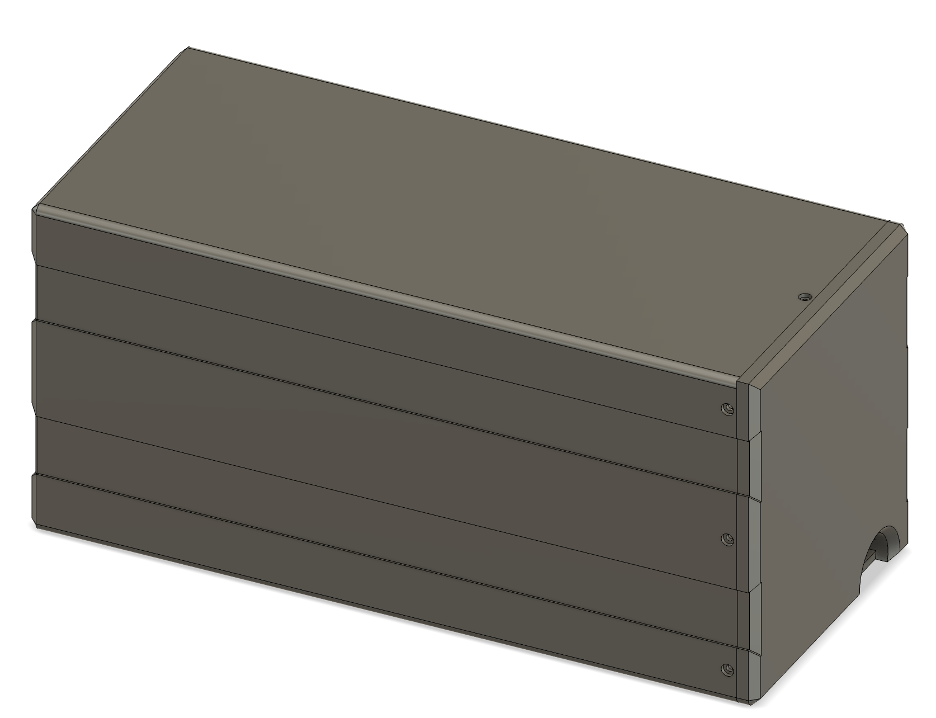
Design Selection & CAD
I considered several structural designs:
1. Bare Cells (Back-to-back)
Simple but risky: vibration can wear through insulators, leading to potential shorts.
2. Double Shrink-Wrap, Back-to-Back
Each cell already has shrink wrap; adding another creates four layers of insulation. Common in DIY builds without cell holders.
3. Honeycomb Cell Holders
Safe and common in commercial packs, but adds 1–2 mm per row/column, increasing size.
4. Two Custom Spacer Concepts
A spacer block with adhesive injection holes, leaving a controlled air gap.
A removable glue-up fixture that provides minimal spacing after assembly.
Both would allow better cooling gaps, these would leave a minimize gap between the battery, more compact than the commercial spacer. but time constraints prevented me from refining them. And the end of the day, it is just part of the 5% of the project.
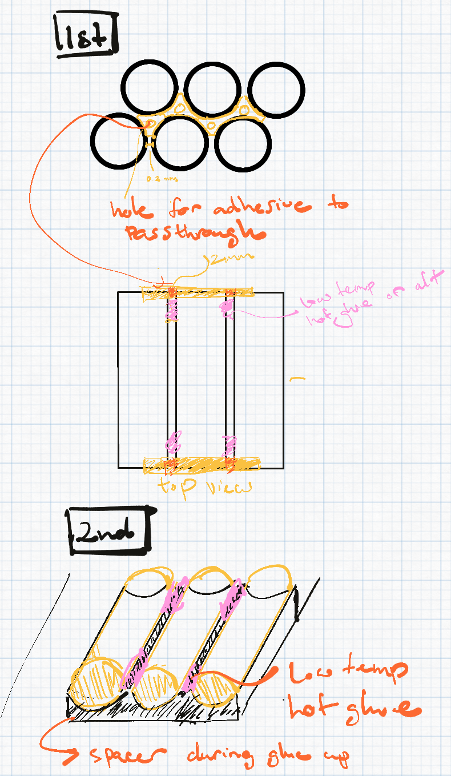
Final Decision
I ultimately went with the double shrink-wrap, back-to-back method.
Final Build
Unsorted Notes & Calculations
Raw notes and scratch calculations. If the embedded viewer does not appear, use the download link below.